Arts & Entertainment
Easter Holiday Tree
Instruction and information for a do it yourself design that everyone can handle.


Easter is right around the corner. I'm not a religious person, but I do love Easter. Ever since I was a little girl, it has been my favorite holiday. My mother always created a basket filled with goodies and treats, and hid it for me to find. So much fun! Even though I live on my own, we still carry on that tradition.
Now that I'm older, I focus more on subtle ways to design my home for Easter. I came up with something really cute that is so easy to do, you can get your kids involved. Not only is it affordable, but it brings you closer to nature as well.
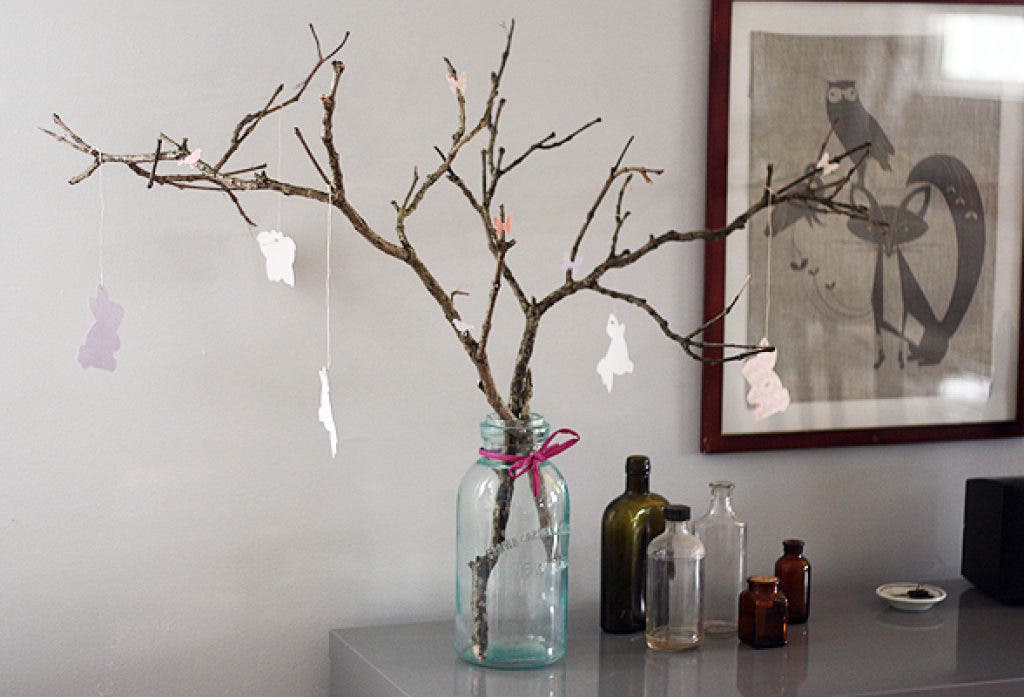
Materials: Two large branches, pencil, glue, scissors, decorative paper & container, string or thread, hole puncher, paper punches and cloth.
Find out what's happening in Rockville Centrewith free, real-time updates from Patch.
First, collect two large branches from your backyard or the nearest park. Choose ones that have smaller branches attached. Wipe with a damp cloth. Pick a decorative container like a vase, pitcher or a vintage jar that is big enough to hold the branches. Insert the branches and stand them up.
Take a nature walk with your children at the or ask some neighbors if you can search their yards for any branches if you don't have any. Visit the on Sunrise Highway to see if you can find a Easter-themed vessel or container.
Find out what's happening in Rockville Centrewith free, real-time updates from Patch.
Now, gather up your paper and materials. Choose decorative paper that carries an Easter theme. You want pastels and cute patterns. It's best to use a card stock because it's heavier than normal paper. You can even use old greeting cards if you have them.
Stop by on Brower Ave. and on N. Park Ave. for stationary and decorative paper.
Draw some cute Easter-themed images on the paper and cut them out. They should be no larger than five inches. If you want to use stencils for this part, fine. It makes it much easier. You should make about four or five of these cutouts.
Use a hole puncher to create a small hole in the corner of each shape. Tie string or thread through the hole and make two knots so it can't slide back through the hole. Hang the shapes on a couple of branches and try to distribute them evenly.
For smaller shapes, use paper punches to create other images to add to the tree. Glue them to the branches for pops of color. Hold down for a couple of seconds to make sure they stay. If you want to add a ribbon or another decorative feature around the container, feel free.
You can find many supplies for this project at on Merrick Road and on N. Village Ave.
Now you have a natural and festive presentation for your home. You can keep it in the middle of the dining room table, in a corner or in your entryway. Wherever you put it, this holiday tree will be sure to bring smiles on people's faces.